

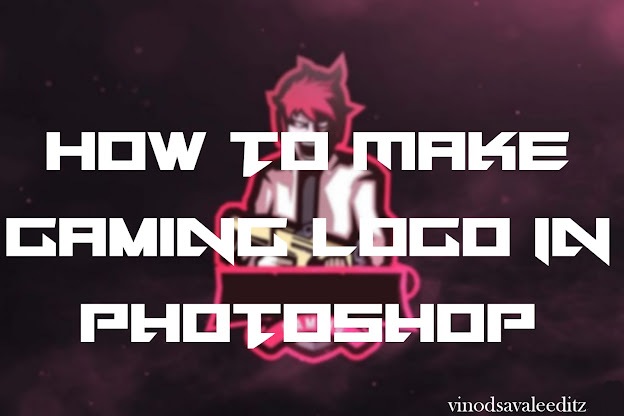
How To Make Gaming Logo In Photoshop By VinodSavaleEditz
Activate the Opacity pressure icon so theharder input of your pen on the tablet creates a darker line, much like how a pencil works. Begin loosely drawing your mascot concept. Browsing for some inspiration beforehand canreally help you develop suitable design ideas in the style of eSports logos. I find it helps to draw basic shapes, or usestraight lines to draw the initial sketch, then go back over the same area and add moreand more definition with darker lines. Once your initial sketch is complete, adda new layer, then reduce the opacity of the original sketch layer. Alter the brush settings to Enable Smoothingand Shape Dynamics. In the top toolbar, increase the smoothingvalue to around 50-60%. This will help you draw nice flowing strokes. Don't forget to turn off the Opacity Pressureoption to draw thick lines with no fading. The Shape Dynamics setting should be set toPen Pressure. This will ensure the strokes taper like areal ink pen. Trace the sketch with carefully drawn lines. Pay attention to the pen pressure to producethick and thin lines, particularly at the ends of a stroke. Once you've traced the lines, you can thengo back and thicken the linework with a slightly larger brush tip to emphasise the broad strokes. Turn down the smoothing value to around 30%. Follow the existing linework to create a thickeroutline all around the illustration, then increase the tapering of any open-ended strokes. Just like in comic book illustrations, lightand shadows can be introduced in this inking stage by blocking in areas with black.
The linework doesn't have to be perfect, butaim to achieve a pretty close depiction of what your final logo design should look like. When your concept is complete, turn off thebasic sketch layer, leaving just the inked design, then draw a selection with the Marqueetool and use the CMD (or CTRL key on Windows)+C shortcut to make a copy, or CMD+Alt+C forCopy Merged if your artwork is split over multiple layers. Paste the sketch into the artboard with CMD+V,then reduce the opacity to around 30% within the Transparency panel. To avoid accidentally moving the sketch outof place, go to Object > Lock > Selection. Clear out the default white fill in the toolbar,leaving just a black stroke. Select the Pen tool and begin tracing theoutline of your sketch. Click and drag bezier handles to form a curvethat matches the concept, then whenever you reach a corner give the point a click to removethe bezier handles. Use the minimum number of points as possibleto smooth out the irregularities of the sketch with clean curves. Complete the outlining path back at the startpoint, then begin tracing the negative space within the sketch. Producing the sketch by hand in Photoshopwith the correct line thicknesses makes it easy to simply trace the concept in Illustratorto reproduce the design but with clean vector paths. If you need to edit or tweak any paths, holdingthe CMD key while the Pen tool is active will toggle the Direct Selection tool, which allowsyou to select and manipulate the bezier curves of a specific point. Once the concept has been traced into digitalpaths, go to Object > Unlock All and delete the sketch. With the Selection tool active, click themain outline path and swap its stroke for a black fill. Drag a selection around the whole design tocapture all the paths, then activate the Shape Builder tool.
Hold the ALT key to subtract an area, thenclick on all the black areas that need punching out to form the illustration. Make any necessary tweaks to the overall outlineof the design to correct any awkward shapes or lines. To add colour to the design, open up the Layerspanel and add a new layer. Drag it below the linework layer, then lockthe linework layer to avoid accidentally selecting it. I've always placed my Layers panel in thebottom left of the screen, but yours might be elsewhere within the interface. Make sure it's visible under the Window menu. Activate the Blob brush from under the Brushtool's tool group. Double click the fill swatch to edit the colour. I'm using a grey-blue of #57627A. Begin colouring in the design by paintingwithin the lines. Since the colour layer is below the lineworklayer, it doesn't matter if you stray over the lines, as long as you don't extend farenough to splurge the colour on the other side. Periodically release the pen or mouse to allowIllustrator to catch up. Any additional strokes will automaticallybe merged with the existing coloured area. Change the colour to fill in the horn.
I'm using a light beige of #E5E1B7. Don't forget to fill in any white areas witha white fill. They can be hard to miss when you're workingagainst a white background, but they soon show up when you place the logo against adifferent colour. The final colour for my design is #AE368Cfor the eye. Shading is what really brings an illustrationto life. Reset the fill colour to black, then findthe Pencil tool. Visualise a basic light source, then begindrawing shapes to act as shadows on your illustration. Start and end the shapes within the blacklinework, but extend a smooth line across the coloured area. Give each shape a black fill, then changethe blend mode to Soft Light, which is an easy way to automatically add shading againstany colour without having to manually find a darker hue. Continue drawing shapes across the artworkto act as shadings. Give each one a black fill and change theblending mode to Soft Light. The Soft Light trick doesn't work againstthe white, so instead use Normal but with reduced opacity. Clicking an existing shape with the Eyedroppertool is an easy way to copy the appearance. Switching to the Pen tool to remove pointsfrom the pencil path, or to adjust the line with the Direct Selection tool can help ensurethe shapes are smooth without any irregularities of a freehand line. Once the shadows have been drawn, the sameprocess can be used to draw highlights. This time use white as the fill, the SoftLight mode automatically produces a lighter hue. Combine all the layers into one by choosingFlatten Artwork from the Layer panel's menu. To create an additional outline around thelogo graphic, select the main outlining shape, then go to Object > Path > Offset path. Enter 10px, or whatever figure suits the scalingof your design to match the thickness of the linework.
Go to Edit > Cut, followed by Paste in Backto place the additional outline at the bottom of the stack. Change its fill colour by eyedropping an existingcolour from the design. I chose the pink from the eye. Let's finish off the design with some text. Use the Type tool to lay out your team name. I'm using a font named Ironstrike from theAdobe Font library. The Black Italic version in particular. Right click the text and choose Create Outlinesto convert the text to shapes. Give it a white fill, then go to Object > Path> Offset Path. Enter 10px again. Fill this additional outline with black tocreate a stroked appearance, then merge all the individual letter outlines into one shapeby clicking the Unite button in the Pathfinder panel. Right click and choose Arrange > Send to Backto make sure there isn't any overlap. Add another Offset Path using this black shape,then give it the same pink outline colour as the main illustration. Click elsewhere on the artboard to deselect,then select the text again. Right click and choose Ungroup. Deselect again, then hold the Shift key andclick each of the white letters to make a selection of them all. Go to Object > Path > Offset Path and adda small negative figure to create an inner outline. Use the Preview to find the right figure forthe scale of your artwork.
Choose a light grey fill for this inner shape,then select the Rectangle tool and draw an overlapping shape that covers the top halfof the text. Shift and click all the grey letters to havethe inner outline and the overlapping rectangle selected, then activate the Shape Buildertool. ALT+Click all the shapes in the top half ofthe text to produce a simple shiny text effect. Drag a selection to capture all the shapesthat make up the text, then reposition them against the logo. Right click and choose Arrange > Send to Back. Select the pink outline of the illustrationand send it to the back too. To see how the logo looks against a darkerbackground. Draw a large rectangle to cover the artboardand give it a black fill. Use the Arrange > Send to Back menu to placeit underneath the logo. Lock this rectangle to avoid accidentallyselecting it. To convert all those Soft Light shapes intoactual colour fills for maximum compatibility, go to Object > Flatten Transparency. Drag the slider all the way to 100% vector. Let me quickly show you how Logo Package Expresscan save you loads of time exporting your logo files. Pick it up with 20% off using the link inthe description, then open it via the Window > Extensions menu. All you have to do it select your logo, thenclick the Set Logo button.
You can then specify individual graphics forthe logo mark, text or tagline to have them exported as individual files. You can then click the Make Print Logos andMake Web Logos buttons to have Logo Package Express automatically make CMYK, mono andreversed version of your logo ready for export. Since this particular design is more of anillustration than a traditional logomark, it's not versatile enough to be used in monoformat so those variants are deleted. Running the package separately with just theblack linework would generate better results for the mono, reverse and mono-reversed versions. Logo Package Express will then automaticallyexport all the file types you could ever need to produce a comprehensive library of logofiles for your client, including AI, EPS, SVG, PDF, PNG and more, all neatly organisedinto named files and folders. So if you enjoyed this tutorial or learntany new tips or techniques, be sure to give the video a Like to help recommend it to others. Subscribe to the channel to stick around formore video tutorials, and head over to my Spoon Graphics website to bag yourself myfree design resources bundle by subscribing to my newsletter. As always thank you very much for watching,and I'll see you in the next one.


0 Comments